Winter Quilt Along
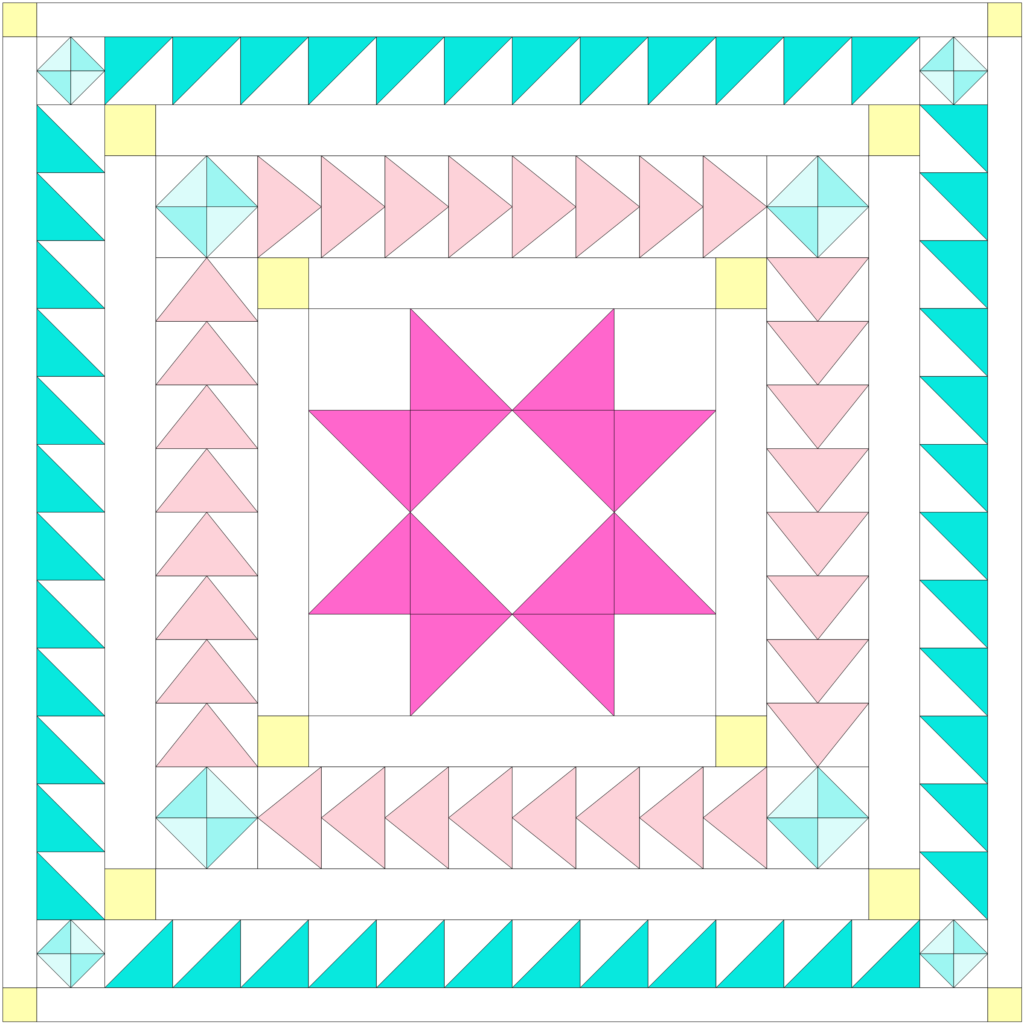
Week-by-week, we’ll sew this quilt top together, and use the opportunity to learn about accurately piecing and designing medallion quilts (a quilt created in rounds, with a central motif) and Julie will be on hand to help you take the framework of this design and make it your own! Replace elements, change layout, experiment with color placement, or simply sew the pattern as is – use this quilt-along in whatever way you want!
This class would be a great follow-up to The Basic Quilt or Skill Builder classes, to expand on the skills learned in those classes, or a wonderful next-step quilt project for anyone refreshing or expanding their piecing skills. Please note that this class will make a completed quilt TOP only, and assumes that you know how to baste, quilt, and bind a quilt in order to finish the quilt on your own later. Beginners should take The Basic Quilt to get started learning!
Basic comfort level with patchwork techniques and terms, including sewing an accurate 1/4” seam. If you took The Basic Quilt class at Cut & Sew, you’re ready! Please remember the class is for making a quilt top only, you can then choose to complete the quilt at home on your own.
You must have your own machine to do continued work at home between classes.
- Fabric requirements for quilt top (quilting cotton):
• Background = 3.5 yd
• Central Star = 1/4 yd
• Border 1 (triangles) = 1/2 yd
• Border 2 (geese) = 3/4 yd
• Border corners = 3 fabrics, 1/8 yd each
Note: this project is great for scrap / stash-busting (especially for the border corners!), and a great candidate to play with the color layout and make it your own. This is just one example of how to arrange colors in this design. Julie will send a coloring sheet ahead of the first session to help you plan, as well as some alternative layout ideas.
Tools:
• Pilot Frixion Pen
• 6” or 6 1/2” x 24” quilting ruler
• 45mm Rotary Cutter with a fresh blade
• Self-healing cutting mat 18” x 24” or larger (check about borrowing from studio if you do not have one and prefer to not purchase)
• 12.5” square acrylic quilting ruler or other square quilting ruler (optional, but handy)
To Finish Quilt later:
• Batting: 65” square
• Backing: 3 3/4 yd
• Binding: 1/2 yd
• Curved Basting Pins (1 1/2” – 2” long)
• Cotton sewing thread, large spool, for quilting
• Hand sewing needle (Clover Black Gold Sharps recommended)
• Walking Foot for your home sewing machine (your machine may have come with one!)